Recent Posts
How Long Should I Expect Mold Removal to Take?
7/18/2024 (Permalink)
Discovering mold in your home can be a stressful experience, and one of the first questions that may come to mind is, "How long will it take to remove the mold?" The duration of mold removal depends on various factors, including the extent of the mold infestation, the size of the affected area, and the methods used for remediation. In this blog, we'll explore the factors that influence the timeline for mold removal and provide an overview of what to expect during the process.
Factors Influencing Mold Removal Timeline
- Extent of Mold Infestation: The severity of the mold infestation is one of the primary factors determining the duration of mold removal. Small, localized mold growth may be easier and quicker to remediate compared to larger, widespread infestations.
- Size of Affected Area: The size of the area affected by mold also plays a significant role in the timeline for mold removal. Larger areas may require more time and effort to clean and remediate thoroughly.
- Type of Mold: Different types of mold may require different approaches to remediation, which can affect the timeline. Some types of mold may be more stubborn or difficult to remove, requiring additional time and resources for remediation.
- Accessibility of the Affected Area: Mold growth in hard-to-reach or confined spaces may require more time and effort to access and remediate effectively. Areas such as crawl spaces, attics, and behind walls may require specialized equipment and techniques for remediation.
- Severity of Damage: Mold growth can cause damage to building materials and infrastructure, which may need to be repaired or replaced as part of the remediation process. The extent of damage can influence the timeline for mold removal and restoration.
- Remediation Methods: The methods used for mold removal and remediation can also impact the timeline. While some techniques may be faster but less effective, others may require more time but provide more thorough and long-lasting results.
Overview of the Mold Removal Process
- Assessment and Inspection: The first step in mold removal is assessing the extent of the mold infestation and identifying the affected areas. A professional mold inspector may conduct a thorough inspection to determine the scope of remediation required.
- Containment: To prevent the spread of mold spores to unaffected areas, containment measures may be implemented. This may involve sealing off the affected area with plastic sheeting and using negative air pressure to contain airborne mold particles.
- Remediation: The remediation process involves removing mold-infested materials, cleaning and disinfecting surfaces, and restoring the affected area to its pre-mold condition. Depending on the extent of the infestation, remediation may take several days to complete.
- Drying and Restoration: After mold removal, the affected area may need to be dried thoroughly to prevent moisture-related issues and inhibit mold regrowth. Any damaged materials may be repaired or replaced as needed to restore the area to its original condition.
- Post-Remediation Testing: Once remediation is complete, post-remediation testing may be conducted to ensure that mold levels have been effectively reduced and that the area is safe for occupancy.
The timeline for mold removal can vary depending on several factors, including the extent of the infestation, the size of the affected area, and the methods used for remediation. If you're dealing with mold in your home, it's essential to consult a qualified mold remediation professional like SERVPRO of NW Wichita to assess the situation and develop a customized remediation plan tailored to your specific needs. By addressing mold promptly and thoroughly, you can restore a safe and healthy indoor environment for you and your family.
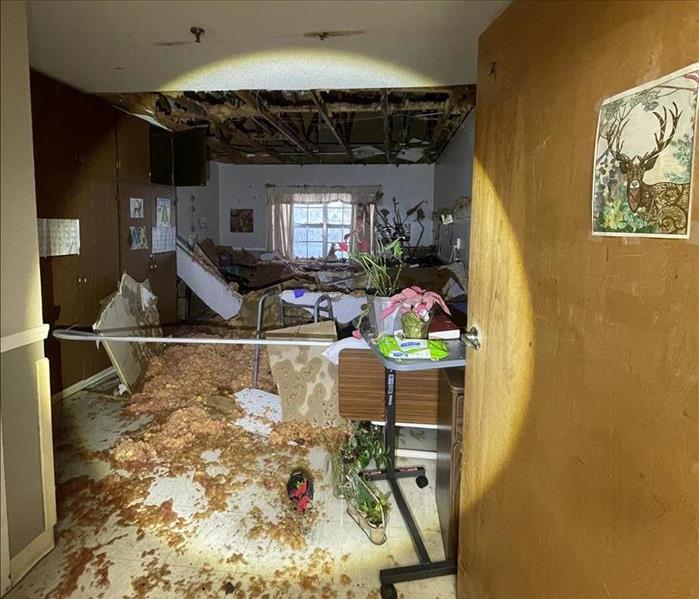
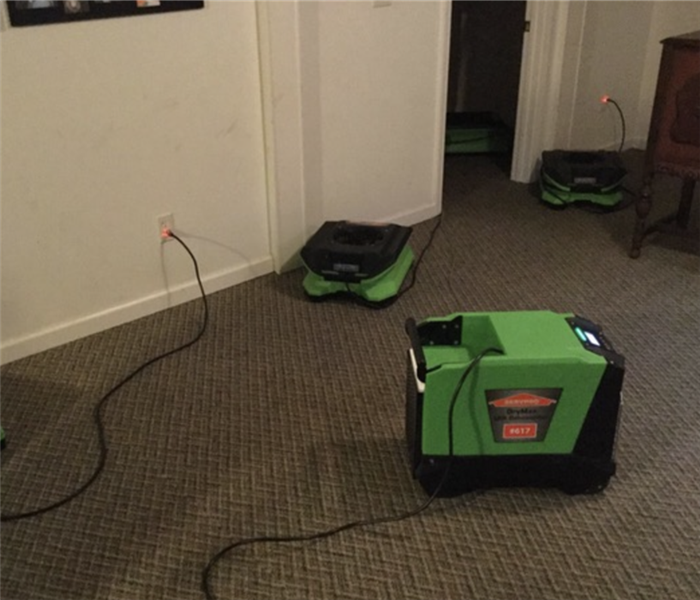
Water Damage from Sewage Backups: Risks and Cleanup
6/19/2024 (Permalink)
At SERVPRO®, we understand the distress that water damage can bring to homeowners and businesses alike. While any water intrusion is concerning, sewage backups pose unique risks and challenges that require immediate attention and specialized cleanup procedures. In this blog post, we'll delve into the dangers associated with sewage backups and offer essential tips for effective cleanup.
Understanding the Risks
Sewage backups occur when the sewage system becomes overloaded or blocked, causing wastewater to flow back into your property. This wastewater, often referred to as "black water," contains a mixture of contaminants, including bacteria, viruses, and other harmful pathogens.
Sewage backups can cause extensive property damage. The contaminated water can permeate porous materials such as carpets, drywall, and upholstery, leading to structural damage and promoting mold growth if not addressed promptly.
Immediate Steps to Take
Upon discovering a sewage backup, it's crucial to take immediate action to minimize the damage and ensure the safety of occupants. Here are the steps to follow:
- Ensure Safety: Avoid contact with the contaminated water and turn off the electrical supply to the affected area to prevent the risk of electrocution.
- Evacuate the Area: If sewage has flooded large areas of your property, consider evacuating until professionals arrive to assess the situation.
- Contact Professionals: Call SERVPRO immediately to dispatch our highly trained technicians equipped with the necessary expertise and specialized equipment to handle sewage cleanup safely and effectively.
Professional Cleanup Procedures
Our certified technicians follow a thorough cleanup process to restore your property to its pre-damage condition:
- Assessment: We conduct a comprehensive inspection to assess the extent of the damage and develop a tailored restoration plan.
- Water Extraction: Using powerful pumps and extraction equipment, we remove standing water from the affected areas.
- Disinfection: We thoroughly disinfect and sanitize all surfaces to eliminate harmful bacteria and pathogens.
- Drying and Dehumidification: We employ advanced drying techniques to remove excess moisture from the air and structural materials, preventing mold growth.
- Restoration: Our team repairs and restores damaged structures and belongings, ensuring that your property is returned to a clean and safe condition.
Preventative Measures
To reduce the risk of sewage backups in the future, consider the following preventive measures:
- Regular inspection and maintenance of your sewage system, including checking for blockages and leaks.
- Proper disposal of household items, avoiding flushing non-biodegradable materials down the toilet.
- Installation of backwater valves to prevent sewage from flowing back into your property during heavy rains or floods.
In conclusion, sewage backups pose significant risks to property. By understanding these risks and taking swift action with professional cleanup services, you can mitigate damage and ensure a safe environment for your family or employees. Remember, when it comes to sewage cleanup, swift action is essential. Contact SERVPRO at the first sign of trouble for prompt and reliable assistance.
Understanding Flash Floods and Their Impact on Properties
5/15/2024 (Permalink)
 Even storm damage like this can be saved by SERVPRO.
In the realm of natural disasters, flash floods stand out as one of the most immediate and devastating threats to both life and property. Unlike traditional floods, which develop over time, flash floods occur suddenly, often with little to no warning, making them particularly dangerous. As a leading restoration and cleaning service provider, SERVPRO® is committed to educating homeowners and property managers on the importance of understanding flash floods and their impact on properties.
What Exactly Are Flash Floods?
Flash floods are rapid and intense flooding events that typically occur within six hours of heavy rainfall, dam or levee failure, or sudden release of water from a natural or man-made source. These floods can also be triggered by factors such as ice or debris jams in rivers and streams, as well as sudden snowmelt.
The Speed and Fury of Flash Floods
One of the defining characteristics of flash floods is their speed and unpredictability. Within minutes, water levels can rise dramatically, engulfing entire neighborhoods and causing significant damage to homes and infrastructure. The force of rushing water can erode foundations, undermine structures, and sweep away vehicles and other belongings.
Understanding the Impact on Properties
The impact of a flash flood on properties can be catastrophic. Water infiltration can lead to structural damage, mold growth, and contamination. Electrical systems may be compromised, posing fire hazards, while valuable possessions may be lost or irreparably damaged. In addition to the immediate physical damage, the emotional toll on homeowners and tenants can be immense.
Steps to Mitigate Damage and Ensure Safety
While it's impossible to prevent flash floods entirely, there are steps that property owners can take to mitigate damage and ensure the safety of occupants:
- Stay informed: Monitor weather forecasts and alerts, especially during periods of heavy rainfall or in flood-prone areas.
- Prepare in advance: Develop a comprehensive emergency plan that includes evacuation routes, emergency contacts, and procedures for shutting off utilities.
- Invest in protective measures: Consider installing flood barriers, sump pumps, and backflow valves to help minimize flood damage.
- Secure valuable items: Elevate appliances, electronics, and sentimental belongings to higher ground or invest in waterproof storage containers.
- Partner with a trusted restoration company: In the event of a flood, enlist the services of a reputable restoration and cleaning company like SERVPRO to assess damage, mitigate risks, and restore your property to its pre-flood condition.
By understanding the nature of flash floods and taking proactive measures to protect their properties, homeowners and property managers can minimize the impact of these devastating events. Remember, preparation is key to staying safe and resilient in the face of natural disasters.
The importance of securing your property after a fire
4/19/2024 (Permalink)
 An example of fire damage.
At SERVPRO®, we understand that the aftermath of a fire can be an overwhelming and distressing experience for property owners. Beyond the immediate devastation, the steps you take in the aftermath can significantly impact the restoration process and the safety of your property. In this blog post, we will explore the crucial importance of securing your property after a fire and share essential tips to guide you through this challenging time.
The Initial Shock
When a fire strikes, it leaves behind not only visible damage but also potential hazards that can compromise the safety of your property. From weakened structures to electrical issues, the aftermath of a fire demands prompt attention and careful handling. Securing your property immediately after a fire is crucial to prevent further damage and ensure the safety of both occupants and restoration professionals.
Preventing Secondary Damage
Once the flames are extinguished, your property becomes vulnerable to secondary damage caused by water, smoke, and soot. Water used to control the fire can lead to mold growth and structural damage if not addressed promptly. Smoke and soot residues, if left unchecked, can penetrate surfaces and exacerbate the deterioration of materials. Securing your property promptly can mitigate these risks and enhance the efficiency of the restoration process.
Limiting Unauthorized Access
An unsecured property is an open invitation to trespassers and vandals. Protecting your premises from unauthorized access is not only essential for preventing theft but also for maintaining the integrity of the restoration process. Implementing temporary fencing and boarding up windows and doors can deter potential intruders and safeguard your property from further harm.
Preserving Valuables
Securing your property extends beyond the physical structure to safeguarding valuable belongings inside. While restoration professionals work on restoring your property, it is crucial to remove salvageable items promptly. By securing and storing these items in a safe, controlled environment, you can prevent further damage and increase the chances of successful restoration.
Key Takeaways
In the aftermath of a fire, time is of the essence. Securing your property promptly can make a significant difference in the outcome of the restoration process. From preventing secondary damage to deterring unauthorized access, taking proactive steps can safeguard your property and pave the way for a smoother recovery.
At SERVPRO, we are committed to helping you navigate through the challenges of fire damage restoration. Our experienced professionals are ready to assist you every step of the way. Contact us today for expert guidance and unparalleled restoration services. Your safety and the preservation of your property are our top priorities.
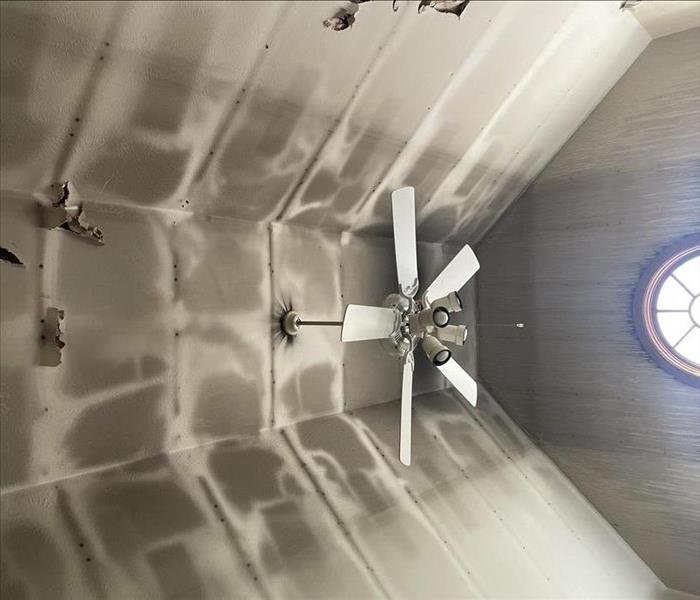
Mold and Moldy Smells: Identifying and Eliminating Odors
3/13/2024 (Permalink)
 SERVPRO is ready to arrive on the scene of your disaster anytime 24/7!
Welcome to the SERVPRO® blog, where we strive to provide valuable information to help you maintain a safe and comfortable living environment. In this post, we'll be discussing a common household issue – mold and the associated moldy smells. Identifying and eliminating these odors is crucial for a happy home. Let's dive into some practical tips to address this concern.
Identifying Moldy Smells
One of the first signs of mold is often the distinctive, musty odor it produces. If you've noticed a persistent musty smell in your home, it's essential to identify the source. Mold tends to thrive in damp and humid environments, making areas like basements, bathrooms, and attics susceptible. Conduct a thorough inspection to pinpoint areas with water damage, leaks, or high humidity levels.
Locate and Address Water Issues
To eliminate moldy smells, it's crucial to address the root cause – water. Identify and fix any water leaks, damaged pipes, or areas prone to flooding. Ensure proper ventilation in spaces like bathrooms and kitchens to reduce humidity. Investing in dehumidifiers can be an effective long-term solution to maintain optimal humidity levels and prevent mold growth.
Cleaning and Disinfecting
Once you've addressed the water issues, it's time to clean and disinfect the affected areas. Use mold-killing solutions and follow the recommended guidelines for safe application. Scrub surfaces thoroughly, focusing on areas where mold is visible. Don't forget to clean air vents, ducts, and other hidden spaces where mold can lurk.
Professional Mold Remediation
While DIY solutions are effective for small mold issues, larger infestations may require professional mold remediation services. SERVPRO experts are trained to assess, contain, and eliminate mold, ensuring a thorough and safe removal process. Professional assistance is especially crucial if you have a recurring mold problem or if mold has spread extensively.
Preventive Measures
To maintain a mold-free environment, adopt preventive measures. Regularly inspect your home for leaks, water damage, or signs of mold growth. Keep indoor humidity levels between 30-50% to discourage mold development. Properly ventilate your home, especially in areas prone to moisture accumulation.
Identifying and eliminating moldy smells is essential for a harmonious living space. By addressing water issues, cleaning thoroughly, and adopting preventive measures, you can create an environment where mold struggles to thrive. For more extensive mold problems, don't hesitate to reach out to SERVPRO for professional mold remediation services. A mold-free home is a happy home!
How to Avoid Common Mistakes When Navigating Water Damage Insurance Claims
1/23/2024 (Permalink)
 Having insurance coverage is essential for mitigating the financial impact of such incidents.
Water damage can strike unexpectedly, causing substantial harm to homes and possessions. Having insurance coverage is essential for mitigating the financial impact of such incidents. However, understanding the intricacies of water damage insurance can be challenging. In this blog, we explore common pitfalls to avoid when navigating water damage insurance coverage.
Know Your Policy
One of the most common pitfalls is a lack of understanding about the specifics of your insurance policy. Policies can vary widely, and it's crucial to know the extent of your coverage, including what is and isn't included. Regularly review your policy and seek clarification from your insurance provider if needed.
Gradual Damage Exclusions
Some policies may exclude coverage for damage that occurs gradually over time, such as a slow leak. It's essential to address such issues promptly and document them to demonstrate that you took reasonable steps to prevent further damage.
Flood Damage
Standard homeowners' insurance typically doesn't cover flood damage. Many homeowners discover this only after a flood occurs. To protect against this, consider purchasing a separate flood insurance policy through the National Flood Insurance Program (NFIP) or a private insurer.
Sewer Backup Coverage
Sewer backups can lead to extensive water damage, but not all policies automatically include coverage for this type of damage. Check your policy to see if sewer backup coverage is included, and consider adding it if not.
Mold Coverage Limitations
While some insurance policies cover mold remediation, there may be limitations on the amount of coverage provided. It's essential to understand these limits and, if necessary, purchase additional coverage for mold-related expenses.
Neglect and Maintenance Exclusions
Insurance policies often exclude coverage for damage resulting from neglect or lack of maintenance. Regularly inspect your home, address maintenance issues promptly, and keep records of your efforts to demonstrate diligence in preventing damage.
High Deductibles
Pay attention to your insurance deductible, as it can significantly impact your out-of-pocket expenses. Understand how much you're responsible for paying before insurance coverage kicks in and consider whether adjusting your deductible makes financial sense for your situation.
Documenting the Damage
Proper documentation is crucial when filing a water damage insurance claim. Take detailed photographs and videos of the damage, keep a record of communication with your insurer, and hold onto receipts for any expenses related to temporary repairs or accommodations.
Delayed Reporting
Timeliness is key when it comes to reporting water damage. Some policies may have strict reporting timelines, and delayed reporting can result in claim denials. Report water damage as soon as it occurs, providing all necessary documentation.
Excluded Causes of Water Damage
Insurance policies may exclude coverage for certain causes of water damage, such as damage resulting from a lack of waterproofing or the use of faulty materials during construction. Be aware of these exclusions and take preventive measures.
Navigating water damage insurance can be complex, but awareness of potential pitfalls is the first step to avoiding financial setbacks. Regularly review and understand the terms of your policy, address maintenance proactively, and promptly report any water damage incidents. By being proactive and well-informed, you empower yourself to navigate the intricacies of water damage insurance coverage and ensure a smoother claims process when the need arises.
Emergency Response Planning for Storms
1/17/2024 (Permalink)
 When a storm ravages your premises, the aftermath can be overwhelming.
As the saying goes, "Before any storm, preparation is key," this holds particularly true for the tempests of nature. At SERVPRO®, we believe in proactive measures for surviving tumultuous weather—bulletproofing your safety with our guide to emergency response planning for storms.
Understanding the Importance of Emergency Planning
An Emergency Response Plan (ERP) is a safety net, a blueprint that outlines how your home or business will respond in the face of an unruly storm. Fast, effective responses can significantly reduce injuries, damages, and recovery time.
Steps to Prepare an Emergency Response Plan for Storms
- Risk Assessment
Evaluate your property's vulnerability to different types of storms—hurricanes, tornadoes, floods. Consider factors like location, structural integrity, and landscape.
- Establish Communication Channels
Create a system to share storm warnings and updates using multiple communication methods to ensure everyone is informed.
- Outline Evacuation Procedures
Plan evacuation routes and safe spaces in your home. For multi-story buildings, allocate a safe space on each floor.
- Assemble an Emergency Kit
This should include essentials like flashlights, first aid equipment, non-perishable food, water, batteries, and important documents.
- Regularly Update and Practice the Plan
Make your plan a living document. Regularly review, update, and practice the plan to ensure everyone is familiar with the procedures.
- Insurance Back-Up
Review your insurance coverage to understand what is covered and what isn't, before a storm strikes. Document your property and belongings as a pre-emptive measure.
- Identify a Professional Restoration Service
Research and identify a professional storm damage cleanup and restoration service like SERVPRO of Northwest Wichita. Quick professional help can mitigate damage and hasten recovery.
SERVPRO®: Your Partner in Storm Damage Restoration
When a storm ravages your premises, the aftermath can be overwhelming. But remember, you're not alone. SERVPRO of Northwest Wichita is always ready to offer expert storm damage restoration services. We will help recover and restore your storm-stricken property swiftly and efficiently, letting you return to normalcy sooner.
Emergency preparedness can seem daunting, but a little planning goes a long way in protecting what matters most in the face of a storm. As you weather life's storms, our SERVPRO® team is just a call away, ensuring it's "Like it never even happened."
The Silent Threat: Gas Leaks and How to Detect Them
12/21/2023 (Permalink)
Gas leaks are a silent danger that can have catastrophic consequences, but with knowledge and vigilance, you can protect your home. In this blog, we'll explore the dangers of gas leaks and provide valuable insights on how to detect them early.
Understanding the Dangers of Gas Leaks
Gas leaks pose various severe consequences. These include risks, such as headaches, dizziness, nausea, and even asphyxiation upon exposure to natural gas or propane. Prolonged exposure can be life-threatening. Additionally, gas leaks are highly flammable, making them a serious risk for fires and explosions. Even a minor spark, such as flipping a light switch, can ignite a gas cloud, leading to devastating consequences. Furthermore, gas leaks can damage appliances, corrode pipes, and result in expensive repairs or replacements.
Detecting Gas Leaks: What to Look For
To identify potential gas leaks, be attentive to the following signs:
Smell
Natural gas and propane are naturally odorless, but utility companies add a distinctive odorant to help you detect leaks. If you notice a "rotten egg" or sulfur-like smell, it's a sign of a gas leak.
Hissing Sound
Gas escaping from a pipe or connection may produce a hissing or whistling noise. If you hear this sound, it's essential to investigate immediately.
Dead Plants
Gas leaks near outdoor lines can kill vegetation. If you notice dead or discolored plants near your gas lines, it could indicate a leak.
Bubbles
Mix a solution of water and dish soap and apply it to gas pipes or connections. If you see bubbles forming, it's a sign of a leak.
Pilot Light Problems
If your gas appliances, like a water heater or furnace, have a pilot light that frequently goes out, it could indicate a gas leak or other issues with your appliance.
What to Do if You Suspect a Gas Leak
If you suspect a gas leak, take these immediate actions:
- Evacuate: Leave your home promptly and ensure doors and windows are open to ventilate the area.
- Do Not Use Electronic Devices: Avoid using electrical or electronic devices that could cause sparks.
- Turn Off the Gas: If it's safe to do so, turn off the main gas supply valve.
- Call for Help: Contact your gas utility company and emergency services to report the leak. They will dispatch professionals to handle the situation safely.
- Do Not Return Home: Wait for authorities or utility company personnel to confirm that it's safe to re-enter your home.
Gas leaks are a dangerous threat that can jeopardize your safety and your property. Understanding the signs of a gas leak and knowing what to do in the event of a leak is critical for preventing accidents and disasters. Your safety and the safety of your loved ones should always be a top priority.
If you've experienced a gas-related incident or need assistance with any other home-related disasters, remember that SERVPRO of Northwest Wichita is here to help. Our trained professionals are equipped to handle a wide range of emergencies and ensure your home is safe and secure. Stay informed, stay safe, and stay vigilant.
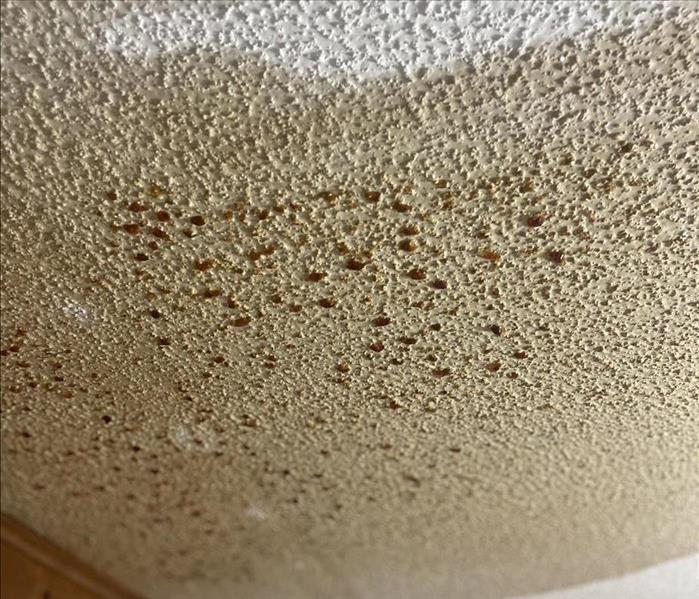
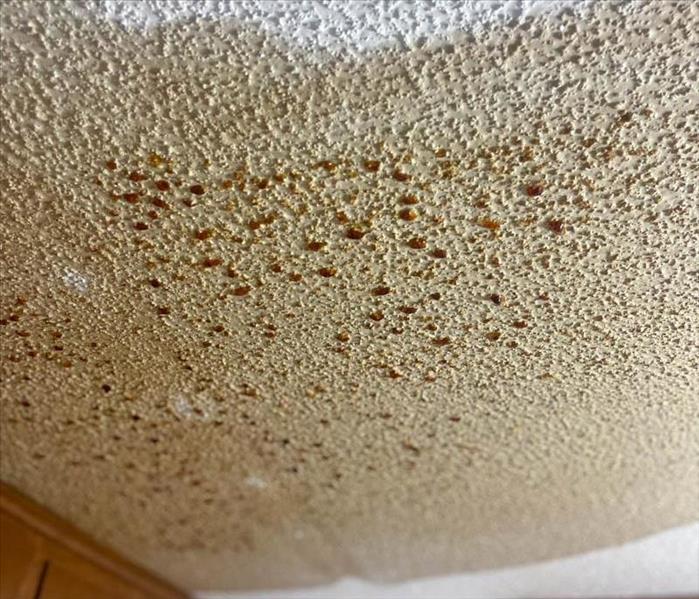
The 6 Most Common Types of Mold Found in Homes
11/15/2023 (Permalink)
 Being aware of these common types of mold found in homes is the first step in effective mold prevention and management.
Mold is a common concern for homeowners, and understanding the various types of mold that can lurk in your home can be crucial for effective management. In this blog, we'll explore the most common types of mold found in Wichita, KS homes. Armed with this knowledge, you'll be better prepared to identify and address mold issues in your living space.
Cladosporium
One of the most prevalent molds in homes, Cladosporium, often appears as dark green or black spots but can also have a brownish hue. This mold typically thrives on fabrics, carpets, and other porous materials. It can also take hold in damp basements and on painted surfaces. Cladosporium is a resilient mold that can be found indoors and outdoors, making it a common visitor in homes across Wichita.
Penicillium
Penicillium molds come in various colors, including blue, green, and yellow, and they often have a fuzzy appearance. These molds are frequently found on damp building materials, wallpaper, and insulation. Penicillium is also known to flourish in homes with water damage or high humidity levels. Identifying and addressing Penicillium is crucial to maintaining a healthy indoor environment.
Aspergillus
Aspergillus molds can vary in color, ranging from yellow to green and brown, and they typically grow in a powdery or fluffy texture. You can find Aspergillus mold in dust and on surfaces like drywall, insulation, and HVAC systems. This type of mold is often associated with water leaks or condensation issues. Addressing moisture problems is essential to prevent Aspergillus growth.
Stachybotrys (Black Mold)
Stachybotrys, often referred to as black mold, is notorious for its dark black or dark greenish-black color and slimy appearance. This mold is a significant concern as it can cause significant damage to your home or business. Stachybotrys prefers materials with high cellulose content, such as drywall and wood, especially in areas with excessive moisture. Prompt professional remediation is essential if you encounter black mold!
Alternaria
Alternaria molds are typically dark brown to black with a fuzzy texture, and they can also appear olive-green. They are commonly found in damp areas like showers, sinks, and damp basements. This mold is known to trigger allergies in some individuals, so it's important to address moisture issues and clean affected areas thoroughly.
Aureobasidium
Aureobasidium molds can be dark brown to black and sometimes appear pink or violet. They often form a velvety texture. This type of mold is commonly found on wooden surfaces, painted walls, and window frames, especially in areas prone to condensation. Proper ventilation and moisture control can help prevent Aureobasidium growth.
Being aware of these common types of mold found in Wichita, KS homes is the first step in effective mold prevention and management. Mold can thrive in various environments, and moisture control, regular inspections, and prompt remediation are essential to keeping mold growth at bay. If you ever discover extensive mold issues or types of mold that you're unsure how to handle, don't hesitate to contact our SERVPRO® if Northwest Wichita team. We're here to provide professional mold remediation services and help you maintain a clean and mold-free living environment. Stay vigilant, Wichita, and keep your home mold-free for a clean and comfortable living space!
How Water Damage Can Raise Your Electricity Bills
10/14/2023 (Permalink)
 Addressing water damage and improving your home's energy efficiency go hand-in-hand.
Wichita, KS, is known for its ever-changing weather, which includes heavy rains and occasional flooding. While water damage is a concern for homeowners, it's also essential to consider the long-term impact on your home's energy efficiency. In this blog, we'll explore how water damage can affect your home's energy efficiency and provide valuable insights into retrofitting solutions that can save you money in Wichita's climate.
Insulation Inspection and Replacement
Water damage can compromise your home's insulation, leading to reduced energy efficiency. Over time, wet insulation becomes less effective, allowing heated or cooled air to escape. Regularly inspect and replace damaged insulation to maintain your home's energy efficiency.
Sealing Leaky Areas
Water damage can weaken the structural integrity of your home, leading to gaps and cracks that allow drafts to enter. Sealing these areas can prevent heat loss during winters and cool air loss in the scorching Wichita summers, reducing energy bills.
Window and Door Upgrades
Water damage can also affect windows and doors, leading to air leaks. Consider upgrading to energy-efficient windows and doors, which not only provide better insulation but also enhance your home's aesthetics.
Roof Repairs and Coatings
A damaged roof can lead to water intrusion and energy loss. Regular roof maintenance and coatings can help prevent water damage and improve your home's energy efficiency by reflecting sunlight and reducing heat absorption.
HVAC Efficiency
Water damage can affect your HVAC system's efficiency. Ensure your HVAC system is properly maintained, and consider upgrading to an energy-efficient model to reduce energy consumption.
Basement Waterproofing
Basements are prone to water damage. Waterproofing your basement can not only prevent water damage but also improve the overall insulation of your home, making it more energy-efficient.
Attic Ventilation
Proper attic ventilation is essential for regulating temperature and moisture. Ensure your attic is well-ventilated to prevent moisture buildup that can lead to water damage and reduce energy efficiency.
Stormwater Management
Implement effective stormwater management solutions to redirect water away from your home's foundation. This proactive approach can prevent water damage and maintain your home's structural integrity.
Professional Restoration Services
In case of water damage, rely on professional restoration services like SERVPRO®. Prompt and thorough water damage restoration can prevent long-term energy efficiency issues.
Addressing water damage and improving your home's energy efficiency go hand-in-hand in Wichita, KS. By taking proactive measures to prevent water damage and retrofitting your home for energy efficiency, you can enjoy lower energy bills, increased comfort, and a more resilient home. If you're dealing with water damage in Wichita or considering energy-efficient retrofits, contact SERVPRO® of Northwest Wichita for expert guidance and restoration services. We're here to help you protect your home and your wallet.


 24/7 Emergency Service